The DKM Narvik-class destroyers were among the most capable German warships of World War II — fast, heavily armed, and battle-hardened from the brutal Norwegian campaign of 1940. The Z37 in particular served extensively in the Baltic and English Channel, making her a compelling subject for any serious naval modeler. In 1/72 scale, this destroyer becomes a truly impressive centerpiece — and with the right detail upgrades, you can bring her to a level of accuracy that turns heads at any club meeting or competition.
This guide walks you through the complete build process: from choosing your base kit to adding 3D printed detail sets, painting, and weathering for a museum-quality result.
A Brief History of the Z37
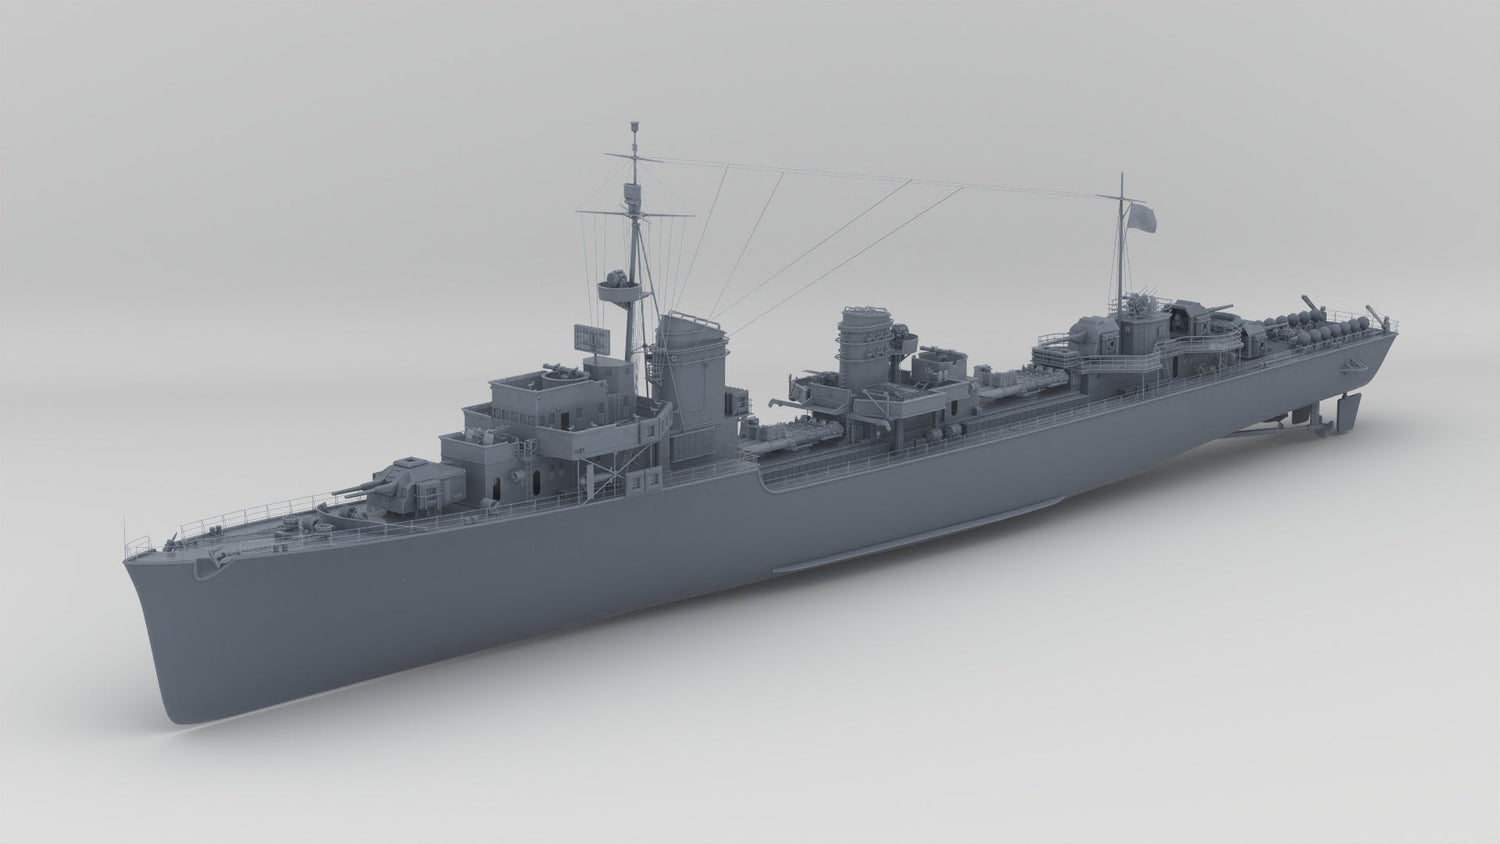
The Z37 was a Type 1936A destroyer, displacing around 3,600 tons fully loaded and capable of 36 knots. Armed with five 15cm guns and a formidable torpedo battery, she was a serious fighting ship. Commissioned in 1942, Z37 participated in operations in the Bay of Biscay and the English Channel before being damaged and eventually scuttled at Bordeaux in August 1944 to prevent capture by Allied forces.
Her relatively short but action-packed career makes her a fascinating subject — and the Narvik class's distinctive profile, with its large funnels and angular superstructure, translates beautifully into 1/72 scale.
Choosing Your Base Kit
In 1/72 scale, the Narvik Z37 is a large model — roughly 180cm (nearly 6 feet) at this scale, so most builders work from a scratch-built or resin hull base. The key is getting the hull proportions right before adding detail parts on top.
Recommended approach:
- Start with a commercially available 1/72 destroyer hull or scratch-build from styrene sheet
- Use the 1/72 DKM Narvik Z37 Hull Set as your foundation — this 3D printed hull captures the correct waterline profile and deck layout of the Z37 with high accuracy


Essential Detail Upgrades
This is where your build goes from "good" to "exceptional." The Narvik Z37 had a number of distinctive features that are worth capturing in detail:
Superstructure & Decks
- 1/72 DKM Narvik Z37 Forward Deck 1 — captures the correct deck planking and fittings forward of the bridge
- 1/72 DKM Narvik Z37 Aft Superstructure — includes torpedo tube mounts and aft gun platform details


Funnels
The Narvik class had two distinctive large funnels — getting these right is critical to the model's silhouette:


Masts & Sensors
- 1/72 DKM Narvik Z37 Forward Mast — includes the distinctive tripod structure and rangefinder platform
- 1/72 DKM Narvik Z37 Aft Mast
- 1/72 DKM Narvik Z37 Radar Antenna — the FuMO radar is a signature feature of late-war German destroyers


Hull Details
- 1/72 DKM Narvik Z37 Hull Hatch — correctly sized deck hatches for 1/72 scale
- 1/72 DKM Narvik Z37 Anchor Set — includes bower anchors and chain detail
- 1/72 DKM Narvik Z37 Forward Breakwater — the characteristic curved breakwater forward of the bridge
- 1/72 DKM Narvik Z37 Rudders Set


Deck Equipment
- 1/72 DKM Narvik Z37 Rangefinder (3m) Tub — the director control tub with rangefinder
- 1/72 DKM Narvik Z37 Funnel Louvers Set — adds the characteristic louvered vents to the funnel bases
- 1/72 DKM Narvik Z37 Naval Mine Cart — a great detail for the aft deck minelaying equipment
- 1/72 DKM Narvik Z37 Rope Reel v2
- 1/72 DKM Narvik Z37 Safe Boat — the ship's boat/lifeboat, correctly scaled


Step-by-Step Build Sequence
Step 1 — Hull preparation
Start with the hull set and sand all mating surfaces smooth. Fill any print lines with thin CA glue or filler primer. Prime with a grey automotive primer to reveal any surface imperfections before painting.
Step 2 — Lower hull painting
Paint the underwater hull in Dunkelrot (dark red) — Vallejo Model Color 70.985 Hull Red is a good match. Mask at the waterline before proceeding.
Step 3 — Upper hull & deck
The Kriegsmarine used a medium grey (Dunkelgrau) for most of the war. Vallejo 70.992 Neutral Grey or Tamiya XF-53 Neutral Grey are both excellent choices. Apply in thin coats for an even finish.
Step 4 — Add deck details
Attach the forward and aft deck parts, funnel louvers, hatches, and breakwater. Use thin CA glue for resin-to-resin joins. Allow full cure time before handling.
Step 5 — Funnels & superstructure
Build up the funnels and superstructure sub-assemblies separately, paint them, then attach to the hull. This makes painting the interior spaces much easier.
Step 6 — Masts & rigging
Install the forward and aft masts last, after all painting is complete. Use stretched sprue or EZ-Line for rigging — the Narvik class had a relatively simple rigging arrangement.
Step 7 — Weathering
German destroyers in active service were rarely pristine. Apply:
- A dark wash (Vallejo Dark Grey Wash or AK Interactive Dark Grey) into all panel lines and recesses
- Rust streaks from anchor hawses and scuppers using orange-brown pigments
- Exhaust staining on the funnels with dark brown/black pigments, fading upward
- Salt spray weathering on the bow using a light dry-brush of off-white
Display & Diorama Ideas
At 1/72 scale, the Z37 makes a stunning standalone waterline display. Consider:
- A resin water base with simulated North Sea chop (grey-green tones)
- A dockside scene with figures and equipment
- A dramatic action scene with wake effects using white acrylic gel
Final Thoughts
The 1/72 DKM Narvik Z37 is one of the most rewarding large-scale naval builds you can undertake. The combination of a historically significant vessel, a distinctive profile, and the wealth of available 3D printed detail parts makes this a project that will challenge and satisfy in equal measure. Whether you're a competition builder or building for the sheer joy of it, the Z37 deserves a place in your collection.
All detail parts referenced in this guide are available at distefano3dprint.com.
Leave a comment
This site is protected by hCaptcha and the hCaptcha Privacy Policy and Terms of Service apply.