Introduction
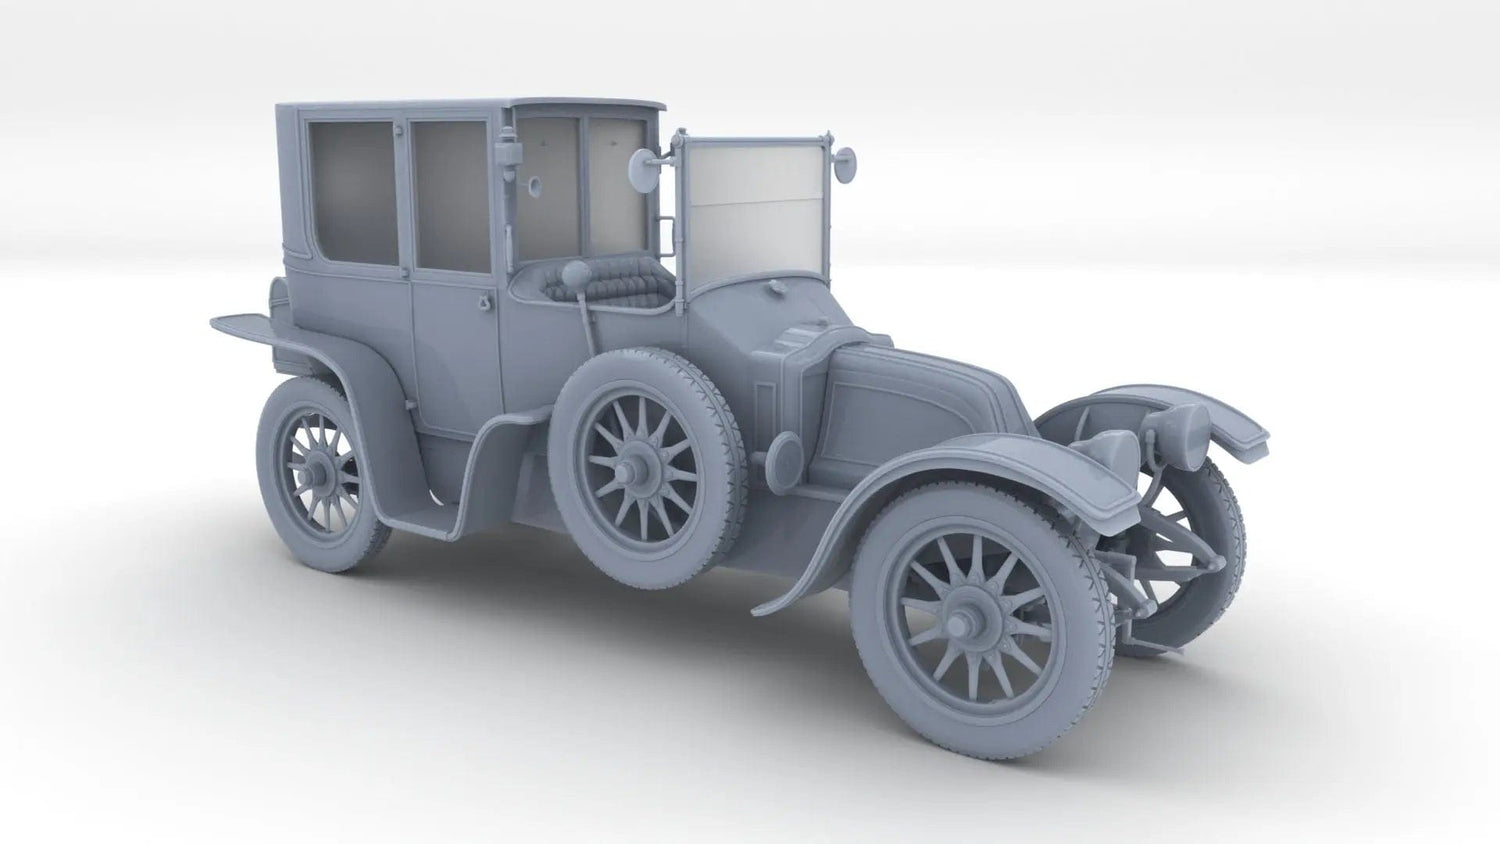
Welcome to the official Distefan 3D Print assembly guide for the 1/18 Scale 1912 Renault Type CB Coupe DeVille Kit — one of our most historically significant models. This legendary automobile was famously transported in the cargo hold of the RMS Titanic, making it a prized piece for both vintage automotive enthusiasts and maritime history collectors.
This guide will walk you through every stage of the build, from preparing your workspace to applying the final finishing touches. Whether you're an experienced modeler or tackling your first resin kit, follow these steps carefully for a museum-quality result.
What's in the Box
Before you begin, lay out all components and verify you have the following parts:
- Chassis & Suspension: Three-part chassis (front, mid, rear), full suspension assembly, and pedals
- Body & Fenders: Front fenders, rear fenders, rear box with racks, and rear chassis doors
- Lights & Trim: Front lamps and lights set, rear lamp, horns set, and rearview mirror
- Interior & Controls: Steering wheel, front windshield frame, door handles, and engine crank
- Wheels: Full set of precision-scaled rims and tires
- Glazing: Glasses set for the windows
Tip: All parts arrive pre-separated and sprue-free — no cutting required. Simply lay them out on a white foam tray or egg carton to keep them organized.


Tools & Materials You'll Need
- Fine-grit sandpaper (400, 800, and 1200 grit)
- Cyanoacrylate (CA) glue and accelerator
- Two-part epoxy (for heavier joins)
- Primer spray (grey or white, resin-compatible)
- Acrylic or enamel paints (black, deep red, metallic gold/brass, silver)
- Fine detail brushes (sizes 0, 00, 000)
- Masking tape
- Isopropyl alcohol (90%+) for resin cleaning
- Gloss and matte varnish
Step 1 – Cleaning and Preparing the Resin Parts
High Detail Resin Grey parts may have a release agent residue from the printing process. This must be removed before priming or painting. The good news: all parts arrive clean and sprue-free, so no cutting is needed — just a light sand and wash.
- Soak all parts in isopropyl alcohol (90%+) for 10–15 minutes.
- Gently scrub with an old toothbrush to remove any residue.
- Rinse with clean water and allow to dry completely (at least 1 hour).
- Lightly sand each part with 400-grit sandpaper to smooth any minor surface texture, then progress to 800 and 1200 grit for a polished finish ready for primer.
- Inspect each part under good lighting for any imperfections. Fill with CA glue if needed and re-sand.
Step 2 – Priming
Priming is essential for paint adhesion on resin.
- Apply a thin, even coat of resin-compatible grey primer to all parts. Spray from approximately 20–25 cm distance.
- Allow to cure for at least 2 hours (or per manufacturer instructions).
- Lightly sand with 1200-grit sandpaper to remove any dust nibs.
- Apply a second thin coat if needed. The surface should be uniformly smooth and matte before painting.
Step 3 – Painting the Chassis and Suspension
The chassis of the 1912 Renault was typically finished in black with metallic accents on mechanical components.
- Paint the three-part chassis (front, mid, rear) in flat black.
- Drybrush the suspension components with a dark metallic grey to simulate bare metal and highlight mechanical detail.
- Paint the pedals in flat black, with a light silver drybrush on the pedal faces.
- Allow all chassis parts to dry fully before assembly.
Step 4 – Assembling the Chassis
- Begin with the mid chassis section as your base.
- Attach the front chassis section using CA glue. Hold firmly for 30–60 seconds or use accelerator. Ensure alignment is straight.
- Attach the rear chassis section in the same manner.
- Fit the suspension components into their designated slots. Test-fit before gluing to confirm correct orientation.
- Attach the pedals to the interior floor of the front chassis section.
- Set aside to cure fully (minimum 30 minutes).
Step 5 – Painting the Body and Fenders
Historical records and the famous Titanic connection associate this Renault with a deep black exterior and richly detailed coachwork.
- Paint the body panels in gloss black for an authentic lacquered coach finish.
- Paint the front and rear fenders in matching gloss black.
- Paint the rear box and racks in flat black, with a subtle dark brown wash to simulate aged wood or leather trim.
- Paint the rear chassis doors in gloss black, adding fine silver or brass trim lines along panel edges using a 000 brush.
- Allow all body parts to dry for at least 4 hours before handling.
Step 6 – Painting the Interior
The interior of the Coupe DeVille was famously appointed in deep red upholstery — a hallmark of Edwardian luxury.
- Paint all interior surfaces in a rich deep red (Burgundy or Carmine Red).
- Add subtle shading with a darker red-brown wash in the recesses to simulate fabric folds and depth.
- Paint the steering wheel in dark brown (simulating wood) with a brass/gold center boss.
- Paint the engine crank in metallic silver with a black wash to bring out detail.
Step 7 – Lights, Horns, and Trim
The brass-era accessories are what truly bring this model to life.
- Paint the front lamps in metallic brass/gold for the housings, with a gloss clear coat over the lens area to simulate glass.
- Paint the rear lamp in the same brass finish.
- Paint the horns set in metallic brass, adding a subtle dark wash to highlight the coiled detail.
- Paint the rearview mirror housing in brass, with a thin coat of silver on the mirror face.
- Paint the windshield frame in brass or dark metallic, depending on your reference.
Step 8 – Wheels and Tires
- Paint the rims in metallic brass or silver, depending on your historical reference.
- Paint the tires in flat black. Add a very light grey drybrush to the tread surface to simulate rubber texture.
- Once dry, carefully glue the tires onto the rims.
- Set aside to cure before attaching to the chassis.
Step 9 – Final Assembly
- Attach the front and rear fenders to the chassis body. Test-fit carefully — resin parts may require light sanding for a flush fit.
- Glue the body panels onto the chassis assembly.
- Attach the rear box with racks and rear chassis doors.
- Install the steering wheel in the interior.
- Carefully position and glue the front lamps, rear lamp, horns, and rearview mirror.
- Attach the windshield frame and fit the glasses (window glazing) into the frame. Use a small amount of clear-drying glue or PVA for the glazing to avoid fogging.
- Finally, attach the four wheels to the axles. Ensure they sit level and straight.
Step 10 – Varnishing and Final Finishing
- Apply a gloss varnish to all painted body panels to replicate the lacquered coach finish of the era.
- Apply a matte varnish to the chassis, tires, and interior to reduce unwanted shine.
- Use a fine brush to apply a pin wash (dark brown or black enamel wash) across all panel lines and recesses to add depth and realism.
- Once fully cured, your model is complete and ready for display.
Display Tips
- Display on a wooden or velvet base for a period-appropriate presentation.
- A glass dome or acrylic display case will protect the model from dust while showcasing its detail.
- Consider adding a small printed placard noting the Titanic connection for a museum-quality display.
A Note from the Founder
"When I designed this kit, I worked directly from period schematics and historical photographs to ensure every detail is as accurate as possible. The 1912 Renault Type CB Coupe DeVille is one of the most evocative automobiles in history — a symbol of Edwardian elegance that met a tragic fate aboard the Titanic. I hope building this model brings you as much joy as designing it brought me."
— Distefan 3D Print, Veteran-Owned & Operated
Have questions about your build? Contact us — we're always happy to help fellow modelers. And don't forget to share your finished build with us on social media!


Leave a comment
This site is protected by hCaptcha and the hCaptcha Privacy Policy and Terms of Service apply.